Building or editing surveys
PERMISSIONS Security level with Admin permission to configure Email Notifications & Surveys, and either Service Desk (Tickets) or Projects & Tasks permissions, or both. Refer to Admin security settings.
NAVIGATION Left Navigation Menu > Admin > Admin Categories > Automation > Email Notifications & Surveys > Surveys > Surveys > click New Ticket Survey or New Task Survey
NOTE To review other help topics on Surveys, refer to Surveys.
The New Ticket Survey and New Task Survey pages are tabbed windows that walk you through the process of creating or editing a survey.
BEFORE YOU BEGIN Before you get started, refer to Best practices for survey questions.
- To open the page, use the path(s) in the Security and navigation section above.
- Populate or update fields on the tabs below:
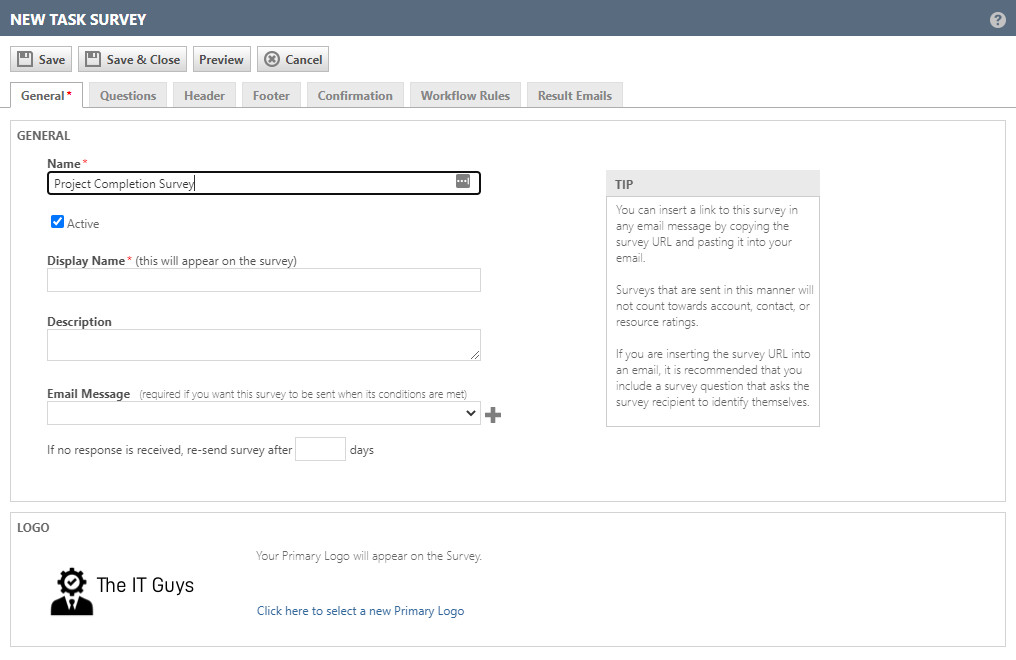
This tab allows you to input basic information (such as name and description) about the survey. You can also select the email message the survey will be attached to.
| Name | Description |
|---|---|
| Name | The internal name of the survey. |
| Active | Indicates whether this survey is available for use. If the survey is inactive, it will not be sent, even if all the selected conditions are met. |
| Display Name | The name your customers will see when they receive the survey. |
| Description | Explains how the survey should be used or why it was created. For internal use only; your customers will not see it. |
| Email Message |
The email message the survey will be attached to. When you create a ticket survey, only ticket survey email messages are available for selection. Likewise, for task surveys, only task survey email messages are available. Select an existing email message template from the drop-down menu, or click the + sign next to the field to create a new one. Refer to Creating and editing survey email messages. NOTE If there’s no email template linked, a workflow rule won’t send the survey. |
| If no response is received... | Enter the number of days before another copy of the survey is sent to the contact if no response is received. Leave this box blank if you do not want to re-send the survey. Activating the setting will not retroactively send follow-ups to individuals who did not previously respond to the survey. It will only apply the rule to future surveys. |
| Logo Area | Allows you to change the logo that appears on your surveys and invoices. Your choice of logo will be applied to surveys and invoices. |
|
Additional fields available after you click Save |
|
| Survey URL |
The URL this survey is published to. You can copy and paste it into any document. If the survey is sent from a workflow rule, it can be selected from a list. |
| Allow multiple responses from the same device |
By default, your customers can return the survey only once from the same browser and device combination. When gathering data for ratings related to a ticket, this prevents one user from skewing the results with multiple responses. Select this check box if you want your customer to be able to respond multiple times to the survey from the same device. As noted in the tip, this option only applies when the survey is not associated with a ticket, and is sent via an email message. |
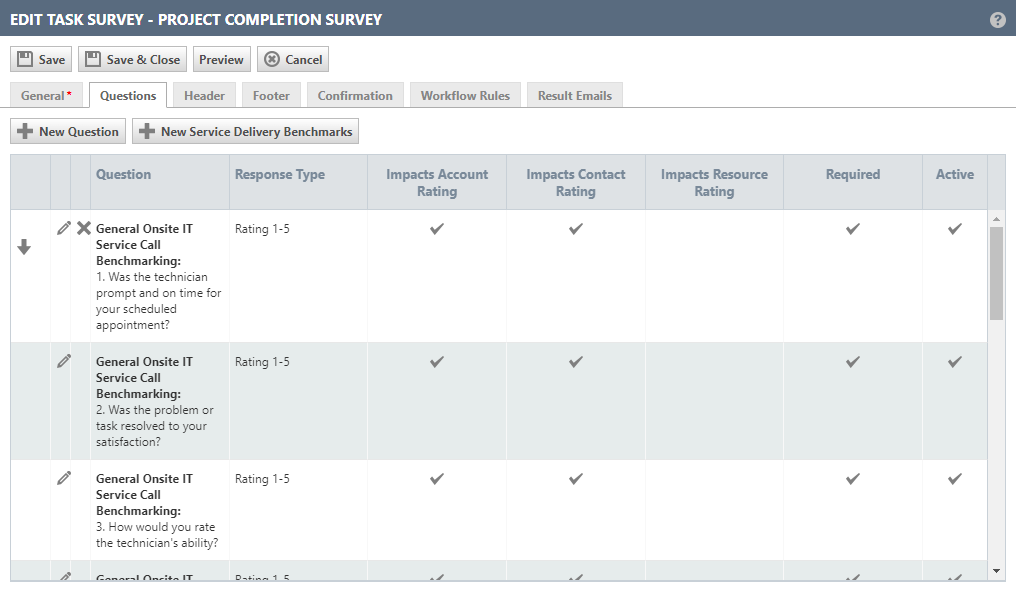
The Questions tab allows you to manage the questions that comprise the survey.
- To add a question, click the New Question button. For more information about creating questions, refer to Adding or editing survey questions.
- To add a set of predefined Benchmarking questions, click the Add Service Delivery Benchmarks button. For more information, refer to Adding service delivery benchmarks to a survey.
- To reorder questions, use the Up and Down arrows.
For detailed field descriptions, refer to Adding or editing survey questions.
| Name | Description |
|---|---|
| New Question | Click this button to add a quastion to the survey. Refer to Adding or editing survey questions. |
| New Service Delivery Benchmarks | To add a set of predefined benchmarking questions, click the Add Service Delivery Benchmarks button. For more information, refer to Adding service delivery benchmarks to a survey. |
| Up and Down Arrows | Move the question up or down in the survey. |
| Edit |
Opens the Edit Question window. |
| Delete |
Deletes the question after confirmation. |
| Question | The question as it appears on the survey. |
| Response Type | The type of response selected when the question was created. |
| Impacts Organization Rating | Indicates whether the answer to the question will impact your overall rating by the organization. |
| Impacts Contact Rating | Indicates whether the answer to the question will impact your rating by the contact. |
| Impacts Resource Rating | Indicates whether the answer to the question will impact your resource's rating. |
| Required | Indicates must answer the question to complete the survey. |
| Active | Indicates whether the question is active. |
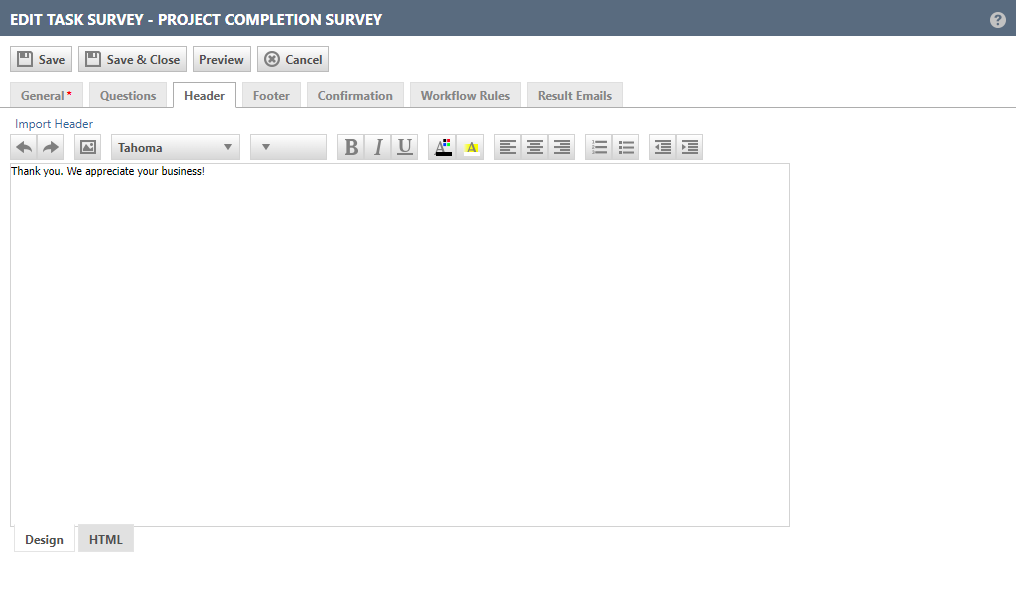
These tabs allow you to create and edit the survey header, footer, and confirmation. They will appear on the survey your customers see. You can also import them from an existing survey.
- To create or edit a header, footer, or confirmation, type in the main text area and use the formatting tools to adjust the way it looks.
- To import a header, footer, or confirmation, click the Import Header (Footer, Confirmation) button. For more information on this, refer to Importing a survey header, footer, or confirmation.
- For the HTML view or to preview the header, footer, or confirmation, click the corresponding tabs at the bottom of the editing page.
| Name | Description |
|---|---|
| Import Header Footer or Confirmation Button | Opens the Import Header (Footer, Confirmation) window, where you can select any header, footer, or confirmation from any active survey. |
| Formatting Toolbar | Allows you to format your text with familiar text editing tools. Refer to The HTML editor. |
| Text Area | Displays the header, footer, or confirmation in Design, HTML, or Preview mode. |
| Design Tab | Displays the header, footer, or confirmation in Design (WYSIWYG) mode. This will enable the formatting toolbar. |
| HTML Tab | Displays the header, footer, or confirmation in design HTML mode. This will disable the formatting toolbar. |
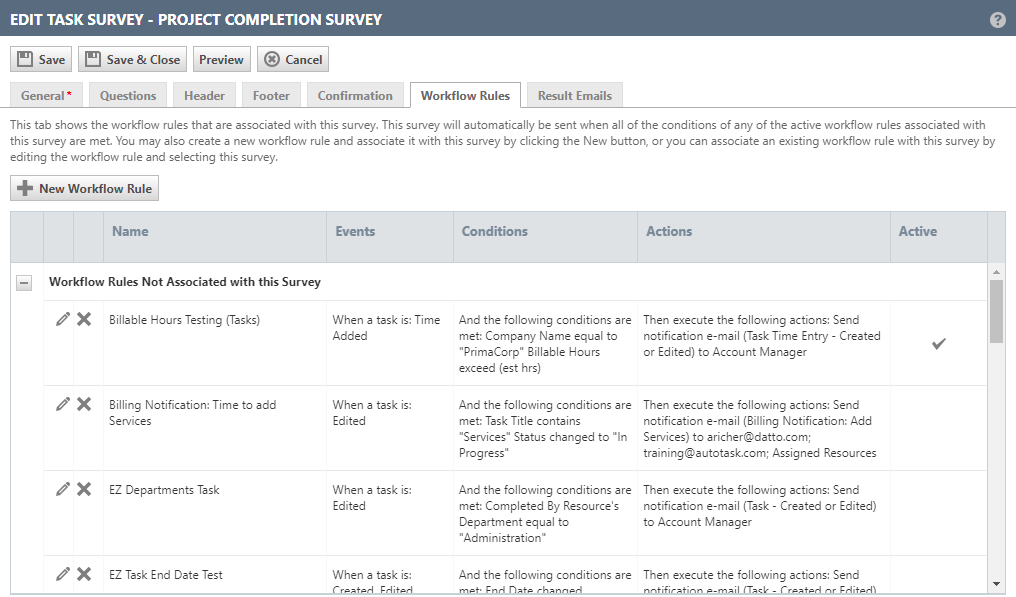
This tab allows you to manage the workflow rules that will cause the survey to be sent automatically when a task or ticket meets the conditions of the workflow rule. The correct type of workflow rule is selected automatically.
Workflow rules already associated with this survey will appear at the top of the list. The workflow rules that are not associated with it will appear below.
- To create a new workflow rule to apply to the survey, click New Workflow Rule. Sending this survey will already be selected in the Actions section of the Workflow Rule window.
- To edit a workflow rule and link it to this survey, click the Edit
 icon. Scroll to the Actions section of the workflow rule and select your survey from the Then send survey to ticket contact: drop-down menu.
 - To delete a workflow rule, click the Delete
 icon.
icon.
IMPORTANT The Workflow Rules tab of the Survey windows allows you to view and manage all your task or ticket workflow rules. If you delete a workflow rule here, it removes it from your Autotask instance.
- To Activate, Inactivate, or Copy a workflow rule, use the right-click menu.
For comprehensive information about workflow rules, refer to Autotask workflow rules.
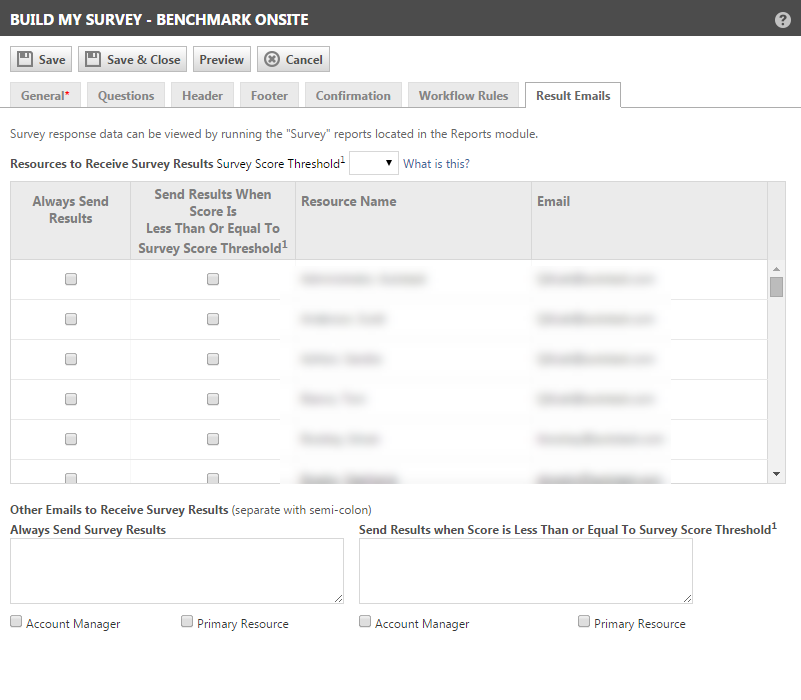
This tab allows you to select the recipients of the survey results. You can choose to always send the results, or to send results only when the survey score falls at or below a threshold that you define. For more information, refer to What's a survey score threshold?
- To send results to a resource, select the appropriate check box next to their name.
- To send results to other email addresses, enter the email addresses in the appropriate field at the bottom on the tab.
| Field Name | Description |
|---|---|
| Survey Score Threshold |
Click the dropdown arrow and select a numerical threshold.
|
| Always Send Results | Select resources who will always receive the survey results. |
| Send Results when... | Select resources who will receive survey results if the score is less than or equal the threshold. |
| Resource Name | Displays the name of the notification recipient. |
| Displays the email address of the notification recipient. | |
| Other Emails to Receive Survey Results | Allows you to enter other emails addresses (separated by semi-colons) to receive notification either always, or when the score falls at or below the Survey Score Threshold. You may also elect to notify the Account manager or the Primary Resource in either circumstance. |
- To preview how the survey will appear to you customers, click Preview anytime.
